Micro SD and tweezers don’t mix

I wanted to update a raspberry pi system from bullseye to bookworm and thought the best backup would be to shutdown the system, remove the memory card, and fully back it up in another machine.

Unfortunately getting the sd card out of the pi in its case was difficult and I attempted to grab it with a pair of tweezers. The scratches on the back of this card appear to go through the very thin plastic and damage the electronics.

When I loaded the drive in another computer it only saw a /dev/sdb volume, and not the /dev/sdb1 and /dev/sdb2 that I was hoping. When I tried putting it back into the original Pi, it never booted. Very Frustrating lesson to learn as I lost data that had been accumulating on this device for several years.

Govee H5105 and Govee H5100 Thermometers

A friend bought a new Govee H5105 Thermometer and since they were on sale at Amazon I picked one up to see if my software could record it’s data or needed changes to support it. The image makes the thermometer look huge next to a phone. It is smaller than any of the other devices with displays. Its display is an e-Ink technology with a shiny plastic layer over the top. The amazon details claim temperature accuracy to ±0.54℉/±0.3℃, and humidity accuracy at ±3%RH. The older devices I’ve been using have been ±0.2℃ which indicates a new sensor is being used. This uses a CR2450 button type battery with claims to up to a year. I’ll be interested to see how long it lasts.

I bought a Govee H5100 device last August and it’s been supported by my data recording software since then. The H5100 uses a single AAA battery and has no display. It also is described using the same temperature and humidity accuracy, ±0.54℉/±0.3℃ and ±3%RH, as the h5105. The h5100 battery died on January 12th, just under five months. I replaced the battery and will see if the first time frame is what to expect from the H5100 device, or just a bad starting battery.

Each of these devices broadcasts temperature data using BLE (Bluetooth Low Energy) advertisements. The advertising data is similar to the other Govee devices I’ve used, so supporting them was extremely easy. Unfortunately, I have not managed to retrieve any stored data from the h5100 in the time it’s been in use, leading me to believe that it’s either a different connected protocol or at least a different GUID from the older Govee devices. The fact that my software has not been able to download data from the h5100 may have contributed to the speedy battery usage because it attempts to make a connection to the device and download data and will keep retrying when data hasn’t been downloaded in the past two weeks. I believe that a BLE connection requires significantly more power than a BLE advertisement.

At some point I’ll have to dig out my old Android Tablet, enable developer mode and Bluetooth logging, run the Govee App, and get a capture of the data transferred to understand what’s required to receive historical data from the device. The very nature of doing that is a tedious set of steps and I was just searching to see if I’d documented it but couldn’t find mention of it here.

Revisiting the SIM7600G-H 4G HAT using Bookworm

Last year I got a couple of cellular modem hats for the Raspberry Pi Zero and have been using them with data sims on my Google Fi account. I documented the initial testing and my final setup.

I’ve never really liked the RNDIS mode that I had the system running in. (AT+CUSBPIDSWITCH=9011,1,1) It created a usb0 network interface that the Raspberry worked fine with, but the interface came up with an private space IPv4 address that was being NATed and would cause routing issues because the system treats the usb0 interface as a wired interface with a lower metric than the wifi interface.

I was playing with replacing my Raspberry Pi ZeroW with a Raspberry Pi Zero 2 W and in the process switching to the latest version of raspbian and 64 bit kernel. In doing that, the network stack moves up to using ModemManager and NetworkManager for configuration. Both of those are new to me, and the simple tutorials for the Raspberry are all based on using the graphical interface tools to manage the network. I’m running a system without a monitor and chose to install without the graphical interface to save the overhead. The two programs I needed to learn about are mmcli for the Modem Manager and nmcli for the Network Manager.

To be able to get to the /dev/ttyUSB2 device to configure the modem I first need to disable the Modem Manager temporarily. (I also had to install minicom with the command sudo apt install minicom.) I ran the command sudo systemctl stop ModemManager.service && minicom -D /dev/ttyUSB2 and then checked on the status of the modem by issuing the following commands.

ATE
AT&F
ATI
AT&V
AT+CGDCONT?
AT+CUSBPIDSWITCH?
AT+CGPSAUTO?
AT+CUSBPIDSWITCH=9001,1,1

The ATE turns local echo on, making it easier to recognize what’s being typed. AT&F is supposed to reset everything to factory defaults. ATI returns information about the module. AT&V displays the current configuration. The important line is AT+CUSBPIDSWITCH=9001,1,1 which confirms that the modem is in it’s default mode which the manufacturer calls NDIS and is referred to as QMI in most linux documentation.

After configuring the modem, I power cycled everything to make sure it would come up in a known state. The magic command I learned about to make the Network Manager connect to the cellular network is sudo nmcli connection add type gsm ifname '*' con-name '1-gsm' apn '<APN>' connection.autoconnect yes where I replaced <APN> with h2g2 for the APN for Google Fi.

After entering that, I’ve got a running wwan0 interface that is connected to the cellular network and network manager prioritizes traffic correctly across the interfaces. It only gets an IPv6 address on the cellular network, so as long as my wlan0 interface has an IPv4 address my IPv4 traffic seems to route over the wlan0 interface, and IPv6 traffic goes via the wwan0 interface. Some testing I did last year taught me that the cellular carrier does automatic IPv4 to IPv6 translation, so if my wlan0 interface went away and I only have the IPv6 address on the wwan0 interface, the device communicates via IPv6 but can still reach IPv4 only hosts buy translation that happens transparently in the cellular carrier somewhere.

To sum up, the configuration I’ve written into the modem is:

AT&F

AT+CUSBPIDSWITCH=9001,1,1
AT+CGDCONT=1,"IPV4V6","h2g2"
AT+CGDCONT=6,"IPV4V6","h2g2"
AT+CGPSAUTO=1

The command I entered to configure Raspian Bookworm with Network Manager is:

sudo nmcli connection add type gsm ifname '*' con-name '1-gsm' apn 'h2g2' connection.autoconnect yes

Crucial USB SSDs

I purchased a new Crucial X10 Pro 4TB Portable SSD in August to use as my primary photo storage for photoshop and lightroom. It has been amazingly fast and changed the way I’ve thought about external drives. It wasn’t inexpensive, but its size and speed have made it worthwhile for me.

During recent sales, I came across Crucial X8 4TB Portable SSD that was an earlier generation, but over $100 cheaper for similar quantity storage. I’ve been thinking about my backup situation since I seem to be carrying the original SSD with me everywhere, so decided to buy the second drive to use as backup media to the first drive.

The X10 drive has an activity indicator cleverly located in the hole for the lanyard. The X8 drive has no activity indicator. When I was copying the data from the X10 drive to the X8 drive, everything seemed to be taking an inordinately long time. After letting my xcopy command run overnight and the copy not being close to 50% done I investigated further and realized that I’d changed a policy on the original drive sometime before and not done the same on the new drive.

I’d set the policy to Better Performance on the X10 drive. Because I generally try to safely remove my USB drives, having windows optimize access makes the drives much more responsive with only rare issues of losing connection to the drive.

The default for a new USB drive plugged into Windows 11 appears to be to do the safest thing possible as far as maintaining file system integrity. Unfortunately, that makes everything slow, even with a fast drive.

Changing to the better performance option fixed my questions about speed on the X8 drive, unfortunately it required a reboot of the system to apply the change.

Raspberry Pi wlan0 down on boot

I’ve been running into strange interactions between WiFi and Bluetooth on my Raspberry Pi and on the devices that have a wired connection I’ve attempted to simplify things by shutting down the wlan0 interface with the command sudo ip link set wlan0 down.

I wanted to have the equivalent automatically done on boot and figured out two methods.

Modify /etc/dhcpcd.conf by adding the command denyinterfaces wlan0 to the end of the file. It leaves me with the interface in an administratively down setting:

wim@WimPi400:~ $ tail /etc/dhcpcd.conf
#profile static_eth0
#static ip_address=192.168.1.23/24
#static routers=192.168.1.1
#static domain_name_servers=192.168.1.1

# fallback to static profile on eth0
#interface eth0
#fallback static_eth0

denyinterfaces wlan0
wim@WimPi400:~ $ ip link
1: lo: <LOOPBACK,UP,LOWER_UP> mtu 65536 qdisc noqueue state UNKNOWN mode DEFAULT group default qlen 1000
    link/loopback 00:00:00:00:00:00 brd 00:00:00:00:00:00
2: eth0: <BROADCAST,MULTICAST,UP,LOWER_UP> mtu 1500 qdisc mq state UP mode DEFAULT group default qlen 1000
    link/ether d8:3a:dd:05:5c:11 brd ff:ff:ff:ff:ff:ff
3: wlan0: <BROADCAST,MULTICAST> mtu 1500 qdisc noop state DOWN mode DEFAULT group default qlen 1000
    link/ether d8:3a:dd:05:5c:12 brd ff:ff:ff:ff:ff:ff
wim@WimPi400:~ $ sudo rfkill list
0: phy0: Wireless LAN
        Soft blocked: no
        Hard blocked: no
1: hci0: Bluetooth
        Soft blocked: no
        Hard blocked: no

The other way I came across was to add dtoverlay=disable-wifi to the /boot/config.txt file. Doing that leaves me without a wireless interface at all.

wim@WimPi400:~ $ tail /boot/config.txt
otg_mode=1

[all]

[pi4]
# Run as fast as firmware / board allows
arm_boost=1

[all]
dtoverlay=disable-wifi
wim@WimPi400:~ $ ip link
1: lo: <LOOPBACK,UP,LOWER_UP> mtu 65536 qdisc noqueue state UNKNOWN mode DEFAULT group default qlen 1000
    link/loopback 00:00:00:00:00:00 brd 00:00:00:00:00:00
2: eth0: <BROADCAST,MULTICAST,UP,LOWER_UP> mtu 1500 qdisc mq state UP mode DEFAULT group default qlen 1000
    link/ether d8:3a:dd:05:5c:11 brd ff:ff:ff:ff:ff:ff
wim@WimPi400:~ $ sudo rfkill list
0: hci0: Bluetooth
        Soft blocked: no
        Hard blocked: no

I like the second method because it has told the kernel to not even load the driver for the Wi-Fi, leaving the least possibilities for interaction between the 2.4GHz radio systems. It also has the advantage that if I need to reenable the Wi-Fi I can do so easily by modifying the config.txt file from any machine since it’s stored on a FAT partition.

Pepwave Max Transit and IPv6

I’ve had a Pepwave Max Transit on my boat for a couple of years and have generally been happy with it. The main thing I’ve been trying to get working and not been able to figure out has been IPv6 support. I find their user support forums nearly impossible to navigate, and haven’t really come across other support options beyond possible paid options. As an individual with a single unit I just want it to work and am not supporting a fleet of systems.

The picture above is the main dashboard that’s presented when you log in. You can reorder the network priority with a drag and drop interface. I recently added a T-Mobile home internet gateway for use when I’m at my home marina. It’s plugged into the Pepwave directly via an ethernet cable.

The T-Mobile internet also is a WiFi hotspot and I was able to see that my machines connected to it were getting IPv6 addresses.

I finally figured out that the way to enable IPv6 on the Pepwave is under a slightly strange location in their interface.

When you click on the network tab at the top, it has a menu of items down the left starting with LAN and some bullets below that. LAN is not selectable, and the first bullet is selected by default. The thing I’d never figured out was that WAN is selectable, and it has a few more options, including the ability to enable IPv6, which I’ve now enabled. The modification option for IPv6 has a drop down menu for the WAN connection, but it only shows the currently enabled network. I’ve not yet had time to test what happens when I power down the T-Mobile internet. It should invalidate all of the globally scoped addresses on my inside network, but I’m not sure if it will support IPv6 traffic on the Google Fi interface.

A nice thing is that this change was able to work without power cycling the modem.

ORICO 2.5 inch USB C Hard Drive Enclosure

I had a couple of SSDs sitting around and wanted to use them over USB instead of leaving them sit on the shelf so I looked at inexpensive enclosures on Amazon and came up with ORICO 2.5 inch USB C Hard Drive Enclosure USB 3.1 Gen 1 to SATA III External Hard Drive Case for SSD HDD 9.5 7mm Tool-Free with UASP for under $10.

I’d definitely wanted a USB C interface on the device for the ease of connecting the cable. This version is supplied with a USB-C to USB-A cable which was good for connecting directly to a Raspberry Pi. They also sell a version that appears exactly the same but is supplied with a USB-C to USB-C cable.

This works as promised but I noticed the strange thing that it hides information about the disk that’s installed. The powered dock I used in my recent installation, the Vantec Nexstar, reports the actual drive name in linux, which leaves me a little more comfortable. Here’s the relevant dmesg output, followed by fdisk and usb details for the drive in the Vantec dock.

[75735.042244] usb 2-2.2: new SuperSpeed USB device number 6 using xhci_hcd
[75735.064039] usb 2-2.2: New USB device found, idVendor=174c, idProduct=5516, bcdDevice= 1.00
[75735.064079] usb 2-2.2: New USB device strings: Mfr=2, Product=3, SerialNumber=1
[75735.064085] usb 2-2.2: Product: USB Mass Storage Device
[75735.064090] usb 2-2.2: Manufacturer: VANTEC
[75735.064095] usb 2-2.2: SerialNumber: AD41314000038
[75735.068759] usb-storage 2-2.2:1.0: USB Mass Storage device detected
[75735.072590] scsi host1: usb-storage 2-2.2:1.0
[75736.074134] scsi 1:0:0:0: Direct-Access     Samsung  SSD 850 EVO 1TB  EMT0 PQ: 0 ANSI: 5
[75736.074465] sd 1:0:0:0: Attached scsi generic sg1 type 0
[75736.080433] sd 1:0:0:0: [sdb] 1953525168 512-byte logical blocks: (1.00 TB/932 GiB)
[75736.081152] sd 1:0:0:0: [sdb] Write Protect is off
[75736.081165] sd 1:0:0:0: [sdb] Mode Sense: 23 00 00 00
[75736.081818] sd 1:0:0:0: [sdb] No Caching mode page found
[75736.081832] sd 1:0:0:0: [sdb] Assuming drive cache: write through
[75736.085623]  sdb: sdb1 sdb2
[75736.086411] sd 1:0:0:0: [sdb] Attached SCSI disk

wim@WimPi4-Backup:~ $ sudo fdisk -l /dev/sdb
Disk /dev/sdb: 931.51 GiB, 1000204886016 bytes, 1953525168 sectors
Disk model: SSD 850 EVO 1TB
Units: sectors of 1 * 512 = 512 bytes
Sector size (logical/physical): 512 bytes / 512 bytes
I/O size (minimum/optimal): 512 bytes / 512 bytes
Disklabel type: dos
Disk identifier: 0x928e5154

Device     Boot  Start        End    Sectors   Size Id Type
/dev/sdb1         8192     532479     524288   256M  c W95 FAT32 (LBA)
/dev/sdb2       532480 1953525167 1952992688 931.3G 83 Linux

wim@WimPi4-Backup:~ $ lsusb
Bus 002 Device 006: ID 174c:5516 ASMedia Technology Inc. USB Mass Storage Device
Bus 002 Device 003: ID 0bc2:ab38 Seagate RSS LLC Backup Plus Hub (Mass Storage)
Bus 002 Device 002: ID 0bc2:ab45 Seagate RSS LLC Backup+ Hub
Bus 002 Device 001: ID 1d6b:0003 Linux Foundation 3.0 root hub
Bus 001 Device 003: ID 0bc2:ab44 Seagate RSS LLC Backup Plus Hub
Bus 001 Device 002: ID 2109:3431 VIA Labs, Inc. Hub
Bus 001 Device 001: ID 1d6b:0002 Linux Foundation 2.0 root hub
wim@WimPi4-Backup:~ $ lsusb -t
/:  Bus 02.Port 1: Dev 1, Class=root_hub, Driver=xhci_hcd/4p, 5000M
    |__ Port 2: Dev 2, If 0, Class=Hub, Driver=hub/3p, 5000M
        |__ Port 1: Dev 3, If 0, Class=Mass Storage, Driver=uas, 5000M
        |__ Port 2: Dev 6, If 0, Class=Mass Storage, Driver=usb-storage, 5000M
/:  Bus 01.Port 1: Dev 1, Class=root_hub, Driver=xhci_hcd/1p, 480M
    |__ Port 1: Dev 2, If 0, Class=Hub, Driver=hub/4p, 480M
        |__ Port 2: Dev 3, If 0, Class=Hub, Driver=hub/3p, 480M

The Orico details:

[75201.010963] usb 2-2.2: new SuperSpeed USB device number 5 using xhci_hcd
[75201.032436] usb 2-2.2: New USB device found, idVendor=152d, idProduct=0576, bcdDevice=12.01
[75201.032455] usb 2-2.2: New USB device strings: Mfr=1, Product=2, SerialNumber=3
[75201.032461] usb 2-2.2: Product: External Disk 3.0
[75201.032466] usb 2-2.2: Manufacturer: JMicron
[75201.032470] usb 2-2.2: SerialNumber: 000000778899
[75201.041093] scsi host1: uas
[75201.042342] scsi 1:0:0:0: Direct-Access     JMicron  Tech             1201 PQ: 0 ANSI: 6
[75201.045191] sd 1:0:0:0: Attached scsi generic sg1 type 0
[75201.045564] sd 1:0:0:0: [sdb] 1953525168 512-byte logical blocks: (1.00 TB/932 GiB)
[75201.045572] sd 1:0:0:0: [sdb] 4096-byte physical blocks
[75201.045779] sd 1:0:0:0: [sdb] Write Protect is off
[75201.045785] sd 1:0:0:0: [sdb] Mode Sense: 53 00 00 08
[75201.046159] sd 1:0:0:0: [sdb] Write cache: enabled, read cache: enabled, doesn't support DPO or FUA
[75201.050811] sd 1:0:0:0: [sdb] Preferred minimum I/O size 4096 bytes
[75201.050827] sd 1:0:0:0: [sdb] Optimal transfer size 33553920 bytes not a multiple of preferred minimum block size (4096 bytes)
[75201.053405]  sdb: sdb1 sdb2
[75201.053747] sd 1:0:0:0: [sdb] Attached SCSI disk

wim@WimPi4-Backup:~ $ sudo fdisk -l /dev/sdb
Disk /dev/sdb: 931.51 GiB, 1000204886016 bytes, 1953525168 sectors
Disk model: Tech
Units: sectors of 1 * 512 = 512 bytes
Sector size (logical/physical): 512 bytes / 4096 bytes
I/O size (minimum/optimal): 4096 bytes / 4096 bytes
Disklabel type: dos
Disk identifier: 0x928e5154

Device     Boot  Start        End    Sectors   Size Id Type
/dev/sdb1         8192     532479     524288   256M  c W95 FAT32 (LBA)
/dev/sdb2       532480 1953525167 1952992688 931.3G 83 Linux

wim@WimPi4-Backup:~ $ lsusb
Bus 002 Device 005: ID 152d:0576 JMicron Technology Corp. / JMicron USA Technology Corp. Gen1 SATA 6Gb/s Bridge
Bus 002 Device 003: ID 0bc2:ab38 Seagate RSS LLC Backup Plus Hub (Mass Storage)
Bus 002 Device 002: ID 0bc2:ab45 Seagate RSS LLC Backup+ Hub
Bus 002 Device 001: ID 1d6b:0003 Linux Foundation 3.0 root hub
Bus 001 Device 003: ID 0bc2:ab44 Seagate RSS LLC Backup Plus Hub
Bus 001 Device 002: ID 2109:3431 VIA Labs, Inc. Hub
Bus 001 Device 001: ID 1d6b:0002 Linux Foundation 2.0 root hub

wim@WimPi4-Backup:~ $ lsusb -t
/:  Bus 02.Port 1: Dev 1, Class=root_hub, Driver=xhci_hcd/4p, 5000M
    |__ Port 2: Dev 2, If 0, Class=Hub, Driver=hub/3p, 5000M
        |__ Port 1: Dev 3, If 0, Class=Mass Storage, Driver=uas, 5000M
        |__ Port 2: Dev 5, If 0, Class=Mass Storage, Driver=uas, 5000M
/:  Bus 01.Port 1: Dev 1, Class=root_hub, Driver=xhci_hcd/1p, 480M
    |__ Port 1: Dev 2, If 0, Class=Hub, Driver=hub/4p, 480M
        |__ Port 2: Dev 3, If 0, Class=Hub, Driver=hub/3p, 480M

The Vantec device is designed to support one or two disks, while the Orico is a single disk device. I find the differences interesting. I’m left wondering if either device hides any important details of the SSD itself that might improve the performance or longevity.

Pi4 and USB Drive over 2TB

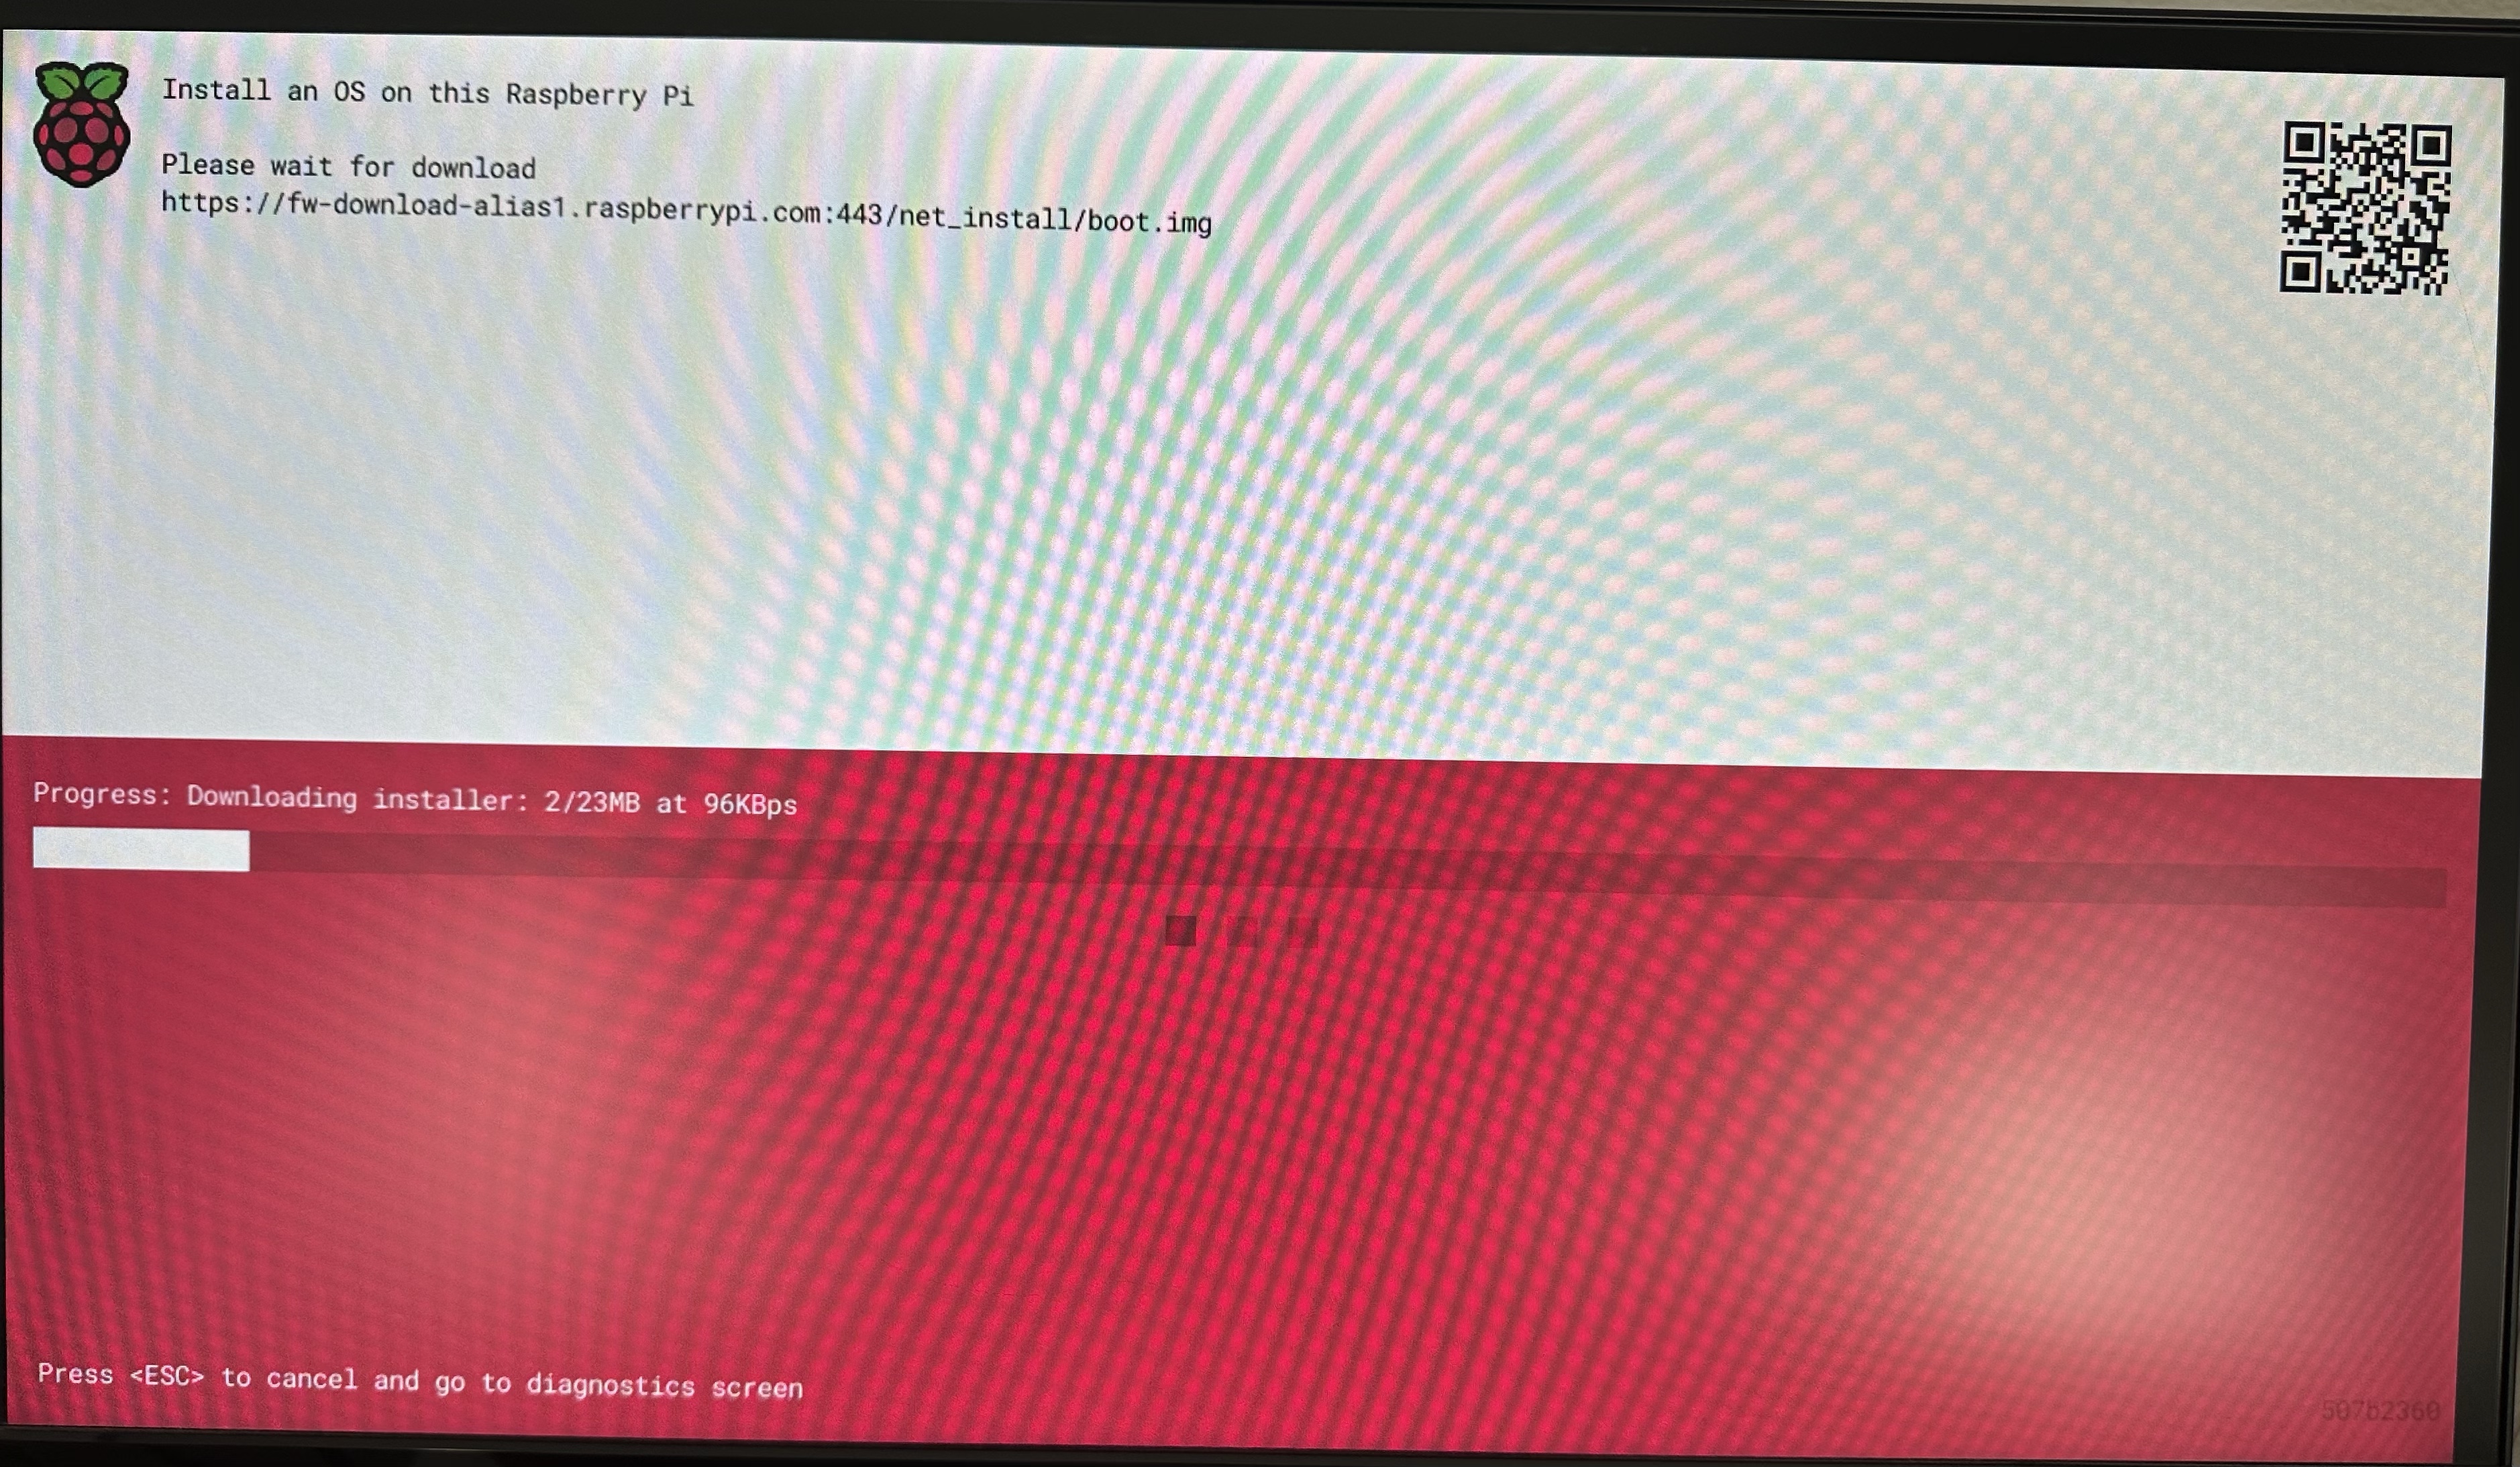
With my recent experience setting up a Pi400 with an external drive and network installation, I decided I wanted to try setting up a Pi4 to boot from a Seagate Backup+ Hub 8TB drive. What I found was that the default Raspbian installation can’t expand the root filesystem on a drive larger than 2TB because it configures the disk to use MBR partitioning scheme. What follows is how I worked around that to get the system working the way I wanted.

After going through the network installation process, I logged in and looked at the current state of the filesystem:

Linux WimPi4-Backup 6.1.21-v8+ #1642 SMP PREEMPT Mon Apr  3 17:24:16 BST 2023 aarch64

The programs included with the Debian GNU/Linux system are free software;
the exact distribution terms for each program are described in the
individual files in /usr/share/doc/*/copyright.

Debian GNU/Linux comes with ABSOLUTELY NO WARRANTY, to the extent
permitted by applicable law.
Last login: Mon May  8 09:47:19 2023 from 192.168.0.57
wim@WimPi4-Backup:~ $ cat /boot/cmdline.txt
console=serial0,115200 console=tty1 root=PARTUUID=aeb14624-02 rootfstype=ext4 fsck.repair=yes rootwait
wim@WimPi4-Backup:~ $ cat /etc/fstab
proc            /proc           proc    defaults          0       0
PARTUUID=aeb14624-01  /boot           vfat    defaults          0       2
PARTUUID=aeb14624-02  /               ext4    defaults,noatime  0       1
# a swapfile is not a swap partition, no line here
#   use  dphys-swapfile swap[on|off]  for that
wim@WimPi4-Backup:~ $ ls -alF /dev/disk/by-partuuid/
total 0
drwxr-xr-x 2 root root  80 May  8 09:48 ./
drwxr-xr-x 7 root root 140 May  8 09:48 ../
lrwxrwxrwx 1 root root  10 May  8 09:48 aeb14624-01 -> ../../sda1
lrwxrwxrwx 1 root root  10 May  8 09:48 aeb14624-02 -> ../../sda2
wim@WimPi4-Backup:~ $ lsblk
NAME   MAJ:MIN RM  SIZE RO TYPE MOUNTPOINT
sda      8:0    0  7.3T  0 disk
├─sda1   8:1    0  256M  0 part /boot
└─sda2   8:2    0  1.7G  0 part /
wim@WimPi4-Backup:~ $ lsusb
Bus 002 Device 003: ID 0bc2:ab38 Seagate RSS LLC Backup Plus Hub (Mass Storage)
Bus 002 Device 002: ID 0bc2:ab45 Seagate RSS LLC Backup+ Hub
Bus 002 Device 001: ID 1d6b:0003 Linux Foundation 3.0 root hub
Bus 001 Device 005: ID 045e:0768 Microsoft Corp. Sidewinder X4
Bus 001 Device 004: ID 045e:0025 Microsoft Corp. IntelliEye Mouse
Bus 001 Device 003: ID 0bc2:ab44 Seagate RSS LLC Backup Plus Hub
Bus 001 Device 002: ID 2109:3431 VIA Labs, Inc. Hub
Bus 001 Device 001: ID 1d6b:0002 Linux Foundation 2.0 root hub
wim@WimPi4-Backup:~ $ lsusb -t
/:  Bus 02.Port 1: Dev 1, Class=root_hub, Driver=xhci_hcd/4p, 5000M
    |__ Port 2: Dev 2, If 0, Class=Hub, Driver=hub/3p, 5000M
        |__ Port 1: Dev 3, If 0, Class=Mass Storage, Driver=uas, 5000M
/:  Bus 01.Port 1: Dev 1, Class=root_hub, Driver=xhci_hcd/1p, 480M
    |__ Port 1: Dev 2, If 0, Class=Hub, Driver=hub/4p, 480M
        |__ Port 2: Dev 3, If 0, Class=Hub, Driver=hub/3p, 480M
        |__ Port 3: Dev 4, If 0, Class=Human Interface Device, Driver=usbhid, 1.5M
        |__ Port 4: Dev 5, If 0, Class=Human Interface Device, Driver=usbhid, 12M
        |__ Port 4: Dev 5, If 1, Class=Human Interface Device, Driver=usbhid, 12M

I ran the gdisk command to create a GUID Partition Table

wim@WimPi4-Backup:~ $ sudo gdisk /dev/sda
GPT fdisk (gdisk) version 1.0.6

Warning: Partition table header claims that the size of partition table
entries is 0 bytes, but this program  supports only 128-byte entries.
Adjusting accordingly, but partition table may be garbage.
Caution: invalid main GPT header, but valid backup; regenerating main header
from backup!

Warning: Invalid CRC on main header data; loaded backup partition table.
Warning! Main and backup partition tables differ! Use the 'c' and 'e' options
on the recovery & transformation menu to examine the two tables.

Warning! Main partition table CRC mismatch! Loaded backup partition table
instead of main partition table!

Warning! One or more CRCs don't match. You should repair the disk!
Main header: ERROR
Backup header: OK
Main partition table: ERROR
Backup partition table: OK

Partition table scan:
  MBR: MBR only
  BSD: not present
  APM: not present
  GPT: damaged

Found valid MBR and corrupt GPT. Which do you want to use? (Using the
GPT MAY permit recovery of GPT data.)
 1 - MBR
 2 - GPT
 3 - Create blank GPT

Your answer: 1

Command (? for help): p
Disk /dev/sda: 15628053167 sectors, 7.3 TiB
Model: Backup+ Hub BK
Sector size (logical/physical): 512/4096 bytes
Disk identifier (GUID): E7CBB654-BC7B-49D9-839E-0067FF1C3A83
Partition table holds up to 128 entries
Main partition table begins at sector 2 and ends at sector 33
First usable sector is 34, last usable sector is 15628053133
Partitions will be aligned on 2048-sector boundaries
Total free space is 15623957100 sectors (7.3 TiB)

Number  Start (sector)    End (sector)  Size       Code  Name
   1            8192          532479   256.0 MiB   0700  Microsoft basic data
   2          532480         4104191   1.7 GiB     8300  Linux filesystem

Command (? for help): w

Final checks complete. About to write GPT data. THIS WILL OVERWRITE EXISTING
PARTITIONS!!

Do you want to proceed? (Y/N): y
OK; writing new GUID partition table (GPT) to /dev/sda.
Warning: The kernel is still using the old partition table.
The new table will be used at the next reboot or after you
run partprobe(8) or kpartx(8)
The operation has completed successfully.

I looked to see the new partition ids of the volumes.

wim@WimPi4-Backup:~ $ ls -alF /dev/disk/by-partuuid/
total 0
drwxr-xr-x 2 root root  80 May  8 10:00 ./
drwxr-xr-x 8 root root 160 May  8 10:00 ../
lrwxrwxrwx 1 root root  10 May  8 10:02 3ecc3350-be31-438c-8876-76a6067d814e -> ../../sda2
lrwxrwxrwx 1 root root  10 May  8 10:02 74fb4bbc-f03a-4501-9b49-13b324f40a64 -> ../../sda1
wim@WimPi4-Backup:~ $ cat /boot/cmdline.txt
console=serial0,115200 console=tty1 root=PARTUUID=aeb14624-02 rootfstype=ext4 fsck.repair=yes rootwait

I had to modify the /boot/cmdline.txt and /etc/fstab files to update the PARTUUID values to the new vales in the GUID Partition Table. After modifying the files they now appear:

wim@WimPi4-Backup:~ $ sudo nano /boot/cmdline.txt
wim@WimPi4-Backup:~ $ cat /boot/cmdline.txt
console=serial0,115200 console=tty1 root=PARTUUID=3ecc3350-be31-438c-8876-76a6067d814e rootfstype=ext4 fsck.repair=yes rootwait

At this point I rebooted the device to make sure it still boots and the existing partitions get mounted correctly. I rebooted the Pi many times during this setup because I wanted to make sure each step was done properly.

wim@WimPi4-Backup:~ $ sudo systemctl reboot
wim@WimPi4-Backup:~ $ Connection to 192.168.0.66 closed by remote host.
Connection to 192.168.0.66 closed.

C:\Users\Wim>ssh 192.168.0.66
Linux WimPi4-Backup 6.1.21-v8+ #1642 SMP PREEMPT Mon Apr  3 17:24:16 BST 2023 aarch64

The programs included with the Debian GNU/Linux system are free software;
the exact distribution terms for each program are described in the
individual files in /usr/share/doc/*/copyright.

Debian GNU/Linux comes with ABSOLUTELY NO WARRANTY, to the extent
permitted by applicable law.
Last login: Mon May  8 10:10:44 2023 from 192.168.0.57
wim@WimPi4-Backup:~ $ df -h
Filesystem      Size  Used Avail Use% Mounted on
/dev/root       1.7G  1.4G  213M  87% /
devtmpfs        3.6G     0  3.6G   0% /dev
tmpfs           3.9G     0  3.9G   0% /dev/shm
tmpfs           1.6G  1.2M  1.6G   1% /run
tmpfs           5.0M  4.0K  5.0M   1% /run/lock
/dev/sda1       255M   31M  225M  13% /boot
tmpfs           782M     0  782M   0% /run/user/1000

So far so good. The issue now is that the root partition is only 1.7G in size. To fix this, I’m going to run fdisk, delete the root partition, and create it again in the same starting location but with the size I want.

wim@WimPi4-Backup:~ $ sudo fdisk /dev/sda

Welcome to fdisk (util-linux 2.36.1).
Changes will remain in memory only, until you decide to write them.
Be careful before using the write command.


Command (m for help): p
Disk /dev/sda: 7.28 TiB, 8001563221504 bytes, 15628053167 sectors
Disk model: Backup+ Hub BK
Units: sectors of 1 * 512 = 512 bytes
Sector size (logical/physical): 512 bytes / 4096 bytes
I/O size (minimum/optimal): 4096 bytes / 4096 bytes
Disklabel type: gpt
Disk identifier: E7CBB654-BC7B-49D9-839E-0067FF1C3A83

Device      Start     End Sectors  Size Type
/dev/sda1    8192  532479  524288  256M Microsoft basic data
/dev/sda2  532480 4104191 3571712  1.7G Linux filesystem

Command (m for help): i
Partition number (1,2, default 2):

         Device: /dev/sda2
          Start: 532480
            End: 4104191
        Sectors: 3571712
           Size: 1.7G
           Type: Linux filesystem
      Type-UUID: 0FC63DAF-8483-4772-8E79-3D69D8477DE4
           UUID: 3ECC3350-BE31-438C-8876-76A6067D814E
           Name: Linux filesystem

Command (m for help): d
Partition number (1,2, default 2):

Partition 2 has been deleted.

Command (m for help): n
Partition number (2-128, default 2):
First sector (34-15628053133, default 532480):
Last sector, +/-sectors or +/-size{K,M,G,T,P} (532480-15628053133, default 15628053133): +500G

Created a new partition 2 of type 'Linux filesystem' and of size 500 GiB.
Partition #2 contains a ext4 signature.

Do you want to remove the signature? [Y]es/[N]o: N

Command (m for help): p

Disk /dev/sda: 7.28 TiB, 8001563221504 bytes, 15628053167 sectors
Disk model: Backup+ Hub BK
Units: sectors of 1 * 512 = 512 bytes
Sector size (logical/physical): 512 bytes / 4096 bytes
I/O size (minimum/optimal): 4096 bytes / 4096 bytes
Disklabel type: gpt
Disk identifier: E7CBB654-BC7B-49D9-839E-0067FF1C3A83

Device      Start        End    Sectors  Size Type
/dev/sda1    8192     532479     524288  256M Microsoft basic data
/dev/sda2  532480 1049108479 1048576000  500G Linux filesystem

Command (m for help): w
The partition table has been altered.
Syncing disks.

wim@WimPi4-Backup:~ $ ls -alF /dev/disk/by-partuuid/
total 0
drwxr-xr-x 2 root root  80 May  8 10:21 ./
drwxr-xr-x 8 root root 160 May  8 10:08 ../
lrwxrwxrwx 1 root root  10 May  8 10:21 4178f32f-bc1b-474a-99b7-b750ce89fdd7 -> ../../sda2
lrwxrwxrwx 1 root root  10 May  8 10:21 74fb4bbc-f03a-4501-9b49-13b324f40a64 -> ../../sda1
wim@WimPi4-Backup:~ $ sudo nano /boot/cmdline.txt
wim@WimPi4-Backup:~ $ sudo nano /etc/fstab
wim@WimPi4-Backup:~ $ sudo systemctl reboot
wim@WimPi4-Backup:~ $ Connection to 192.168.0.66 closed by remote host.
Connection to 192.168.0.66 closed.

The GUID for the partition I changed has been changed, so I now need to update both the /boot/cmdline.txt and /etc/fstab files appropriately. I chose to only have the root partition set to 500 gigabytes instead of filling the entire drive because I wanted to have the majority of my drive formatted using the exFat filesystem to be able to plug the drive into a windows machine if I want to recover files directly from the drive.

After changing the partition table with fdisk and changing the /boot/cmdline.txt and /etc/fstab files I rebooted the machine once more to make sure it was operating from the new partition table, and then I ran the resize2fs command to resize the file system.

wim@WimPi4-Backup:~ $ df -h
Filesystem      Size  Used Avail Use% Mounted on
/dev/root       1.7G  1.4G  213M  87% /
devtmpfs        3.6G     0  3.6G   0% /dev
tmpfs           3.9G     0  3.9G   0% /dev/shm
tmpfs           1.6G  1.2M  1.6G   1% /run
tmpfs           5.0M  4.0K  5.0M   1% /run/lock
/dev/sda1       255M   31M  225M  13% /boot
tmpfs           782M     0  782M   0% /run/user/1000
wim@WimPi4-Backup:~ $ sudo resize2fs /dev/sda2
resize2fs 1.46.2 (28-Feb-2021)
Filesystem at /dev/sda2 is mounted on /; on-line resizing required
old_desc_blocks = 1, new_desc_blocks = 32
The filesystem on /dev/sda2 is now 131072000 (4k) blocks long.

wim@WimPi4-Backup:~ $ df -h
Filesystem      Size  Used Avail Use% Mounted on
/dev/root       493G  1.4G  471G   1% /
devtmpfs        3.6G     0  3.6G   0% /dev
tmpfs           3.9G     0  3.9G   0% /dev/shm
tmpfs           1.6G  1.2M  1.6G   1% /run
tmpfs           5.0M  4.0K  5.0M   1% /run/lock
/dev/sda1       255M   31M  225M  13% /boot
tmpfs           782M     0  782M   0% /run/user/1000
wim@WimPi4-Backup:~ $ sudo systemctl poweroff
wim@WimPi4-Backup:~ $ Connection to 192.168.0.66 closed by remote host.
Connection to 192.168.0.66 closed.

You can see that the filesystem has been resized from 1.7G to 493G. At this point I wanted to test my ssytem by plugging the drive into my windows machine. It all looked good, with a large amount of unalocated space on the drive. I used the windows Disk Managment tool to allocate that free space to a new volume and quick format it to exFat. I ejected it and restarted the Pi from the drive and reconnected.

wim@WimPi4-Backup:~ $ ls -alF /dev/disk/by-partuuid/
total 0
drwxr-xr-x 2 root root 100 May  8 10:34 ./
drwxr-xr-x 8 root root 160 May  8 10:34 ../
lrwxrwxrwx 1 root root  10 May  8 10:34 0a14a02f-ce46-4797-81dc-81e476205906 -> ../../sda3
lrwxrwxrwx 1 root root  10 May  8 10:34 4178f32f-bc1b-474a-99b7-b750ce89fdd7 -> ../../sda2
lrwxrwxrwx 1 root root  10 May  8 10:34 74fb4bbc-f03a-4501-9b49-13b324f40a64 -> ../../sda1
wim@WimPi4-Backup:~ $ sudo mkdir /media/`hostname`
wim@WimPi4-Backup:~ $ sudo nano /etc/fstab
wim@WimPi4-Backup:~ $ cat /etc/fstab
proc            /proc           proc    defaults          0       0
PARTUUID=74fb4bbc-f03a-4501-9b49-13b324f40a64  /boot           vfat    defaults          0       2
PARTUUID=4178f32f-bc1b-474a-99b7-b750ce89fdd7  /               ext4    defaults,noatime  0       1
PARTUUID=0a14a02f-ce46-4797-81dc-81e476205906  /media/WimPi4-Backup exfat defaults,uid=1000,gid=1000 0 2
# a swapfile is not a swap partition, no line here
#   use  dphys-swapfile swap[on|off]  for that
wim@WimPi4-Backup:~ $ df -h
Filesystem      Size  Used Avail Use% Mounted on
/dev/root       493G  1.4G  471G   1% /
devtmpfs        3.6G     0  3.6G   0% /dev
tmpfs           3.9G     0  3.9G   0% /dev/shm
tmpfs           1.6G  1.2M  1.6G   1% /run
tmpfs           5.0M  4.0K  5.0M   1% /run/lock
/dev/sda1       255M   31M  225M  13% /boot
tmpfs           782M     0  782M   0% /run/user/1000
/dev/sda3       6.8T   10M  6.8T   1% /media/WimPi4-Backup

I edited the /etc/fstab file to include a third line for the new partition I wanted mounted with some extra options since it doesn’t support the ext4 file permissions and I wanted to make it easier to access.

Pi400 Network Boot and USB Drive

Pi400 at Microcenter

I had a recent trip through a city with a Microcenter, and with the past year of limited availability of Raspberry Pi devices made a quick trip to see if they had any stock. I really wanted a Pi4 8GB, or a PiZero2W but was happy enough to pick up a Pi400 as I’ve not played around with this model before.

Keyboard
Underside
Plug side

After getting home and staring at the device I remembered that most of my current development has been using cameras connected to the pi camera connector, and there is no obvious access to a camera connector on the Pi400.

I also was staring at my current collection of micro sd cards and trying to decide which one I wanted to use to get the Pi400 up and running. At this point I remembered that the Pi4 devices with USB3 interfaces supposedly can boot from a USB Drive. I have a couple of SSDs that have been sitting unused for over a year, as well as an external dock that I can at least use to get a system up and running.

SSD
Screen before Hard Drive

This is the screen I got when I powered up the Pi and then connected the screen but didn’t have the drive connected. It was in low resolution because I’d not had the screen connected when I applied power. Later images are in full resolution because the power was the last connection I made. The QR Code takes you to the Raspberry Pi Software Page.

Network, Mouse, Drive, Power, and screen plugged in

It cycled through the previous three screens until I held down the shift key to initiate the network boot.

After status messages while it downloaded a network boot image, the screen transformed to look like the same familiar Raspberry Pi Imager application I use on either Windows or Raspian to create a bootable sd card.

I selected the version of Raspian I wanted installed

I selected where I wanted Raspian installed.

I made some changes to the settings so that the machine name and default user were different from the defaults. Because this installer is running from ram, it would let me save the settings, but the drop down “for this session only” was not enabled. The most frustrating issue here is that there’s not an easy way to get my public key to the machine for ssh connections, while the Imager software running on another machine would automatically import the current user key.

After hitting the write button, the standard warning pops up.

After just a couple of minutes the system rebooted and came up with the standard Raspian desktop. It was a very easy install, and arguably much easier than having to fiddle with a microSD card and reader on my primary desktop. The only requirement that might be complicated for some users would be the need to use the wired ethernet cable.

I ran my standard update command, rebooted, and checked the status of the machine. The hard drive access light was blinking regularly for a few minutes but after a short period settled down without constant disk access.

Bluetooth LE Scanning and Govee Thermometers

I’ve been programming Bluetooth software to communicate with Govee thermometers for a couple of years now and still learning how Bluetooth works. I’ve been working with several devices, H5074, H5075, H5174, H5177, plus the meat thermometers H5182 and H5183. (I’ve got pictures of each at https://github.com/wcbonner/GoveeBTTempLogger/tree/master/DeviceImages)

I’ve liked the H5074 the most because of its compact size and the fact that it uses a CR2477 lithium battery for power and seems to run for close to two years without replacement. It also has been surprisingly robust when placed inside my freezer or outside on a balcony railing.

The thermometers broadcast their data over Bluetooth Low Energy (BLE) advertisements. Each of these thermometers stores the previous 20 days or more of data internally and can also be queried directly to retrieve the stored data. I only recently got the code for the direct connection download working. To connect directly the host must stop listening to advertisements, make the connection, download the data, close the connection, and then go back to scanning for advertisements.

There are two modes the host scanning can be set to, Active or Passive. Active mode is the mode I’ve been using for most of this time, and I only recently investigated the differences between Active and Passive.

Passive mode is exactly what it sounds like. The Bluetooth stack only listens for advertisements and makes them available to my program.

Active mode is more complicated. Every time the Bluetooth stack receives an advertisement, it sends a query message to the device that advertised asking for more details. This is all done by the stack with no visibility to my program. It may affect timing of messages arriving or even over the air collisions. I’ve not found detailed descriptions related to this.

The different Govee thermometers appear to operate differently. The H5075, H5174, and H5177 broadcast their temperature, humidity, and battery data while the H5074 only sends the data in a secondary response. This means that data can be gathered from the first three with a host running in passive mode, while a host running in active mode is required to get the data from the H5074. This is unfortunate in a noisy Bluetooth environment because it means that the host itself is adding to the Bluetooth noise.